Introduction
As of August 13, 2024, the traditional checkout.liquid setup will be deprecated for the Information, Shipping, and Payment checkout steps. By August 28, 2025, this deprecation extends to the Thank you and Order status pages. This means it's time for Shopify merchants to transition to Checkout Extensibility, a more versatile and robust system.

1. What is Checkout Extensibility?
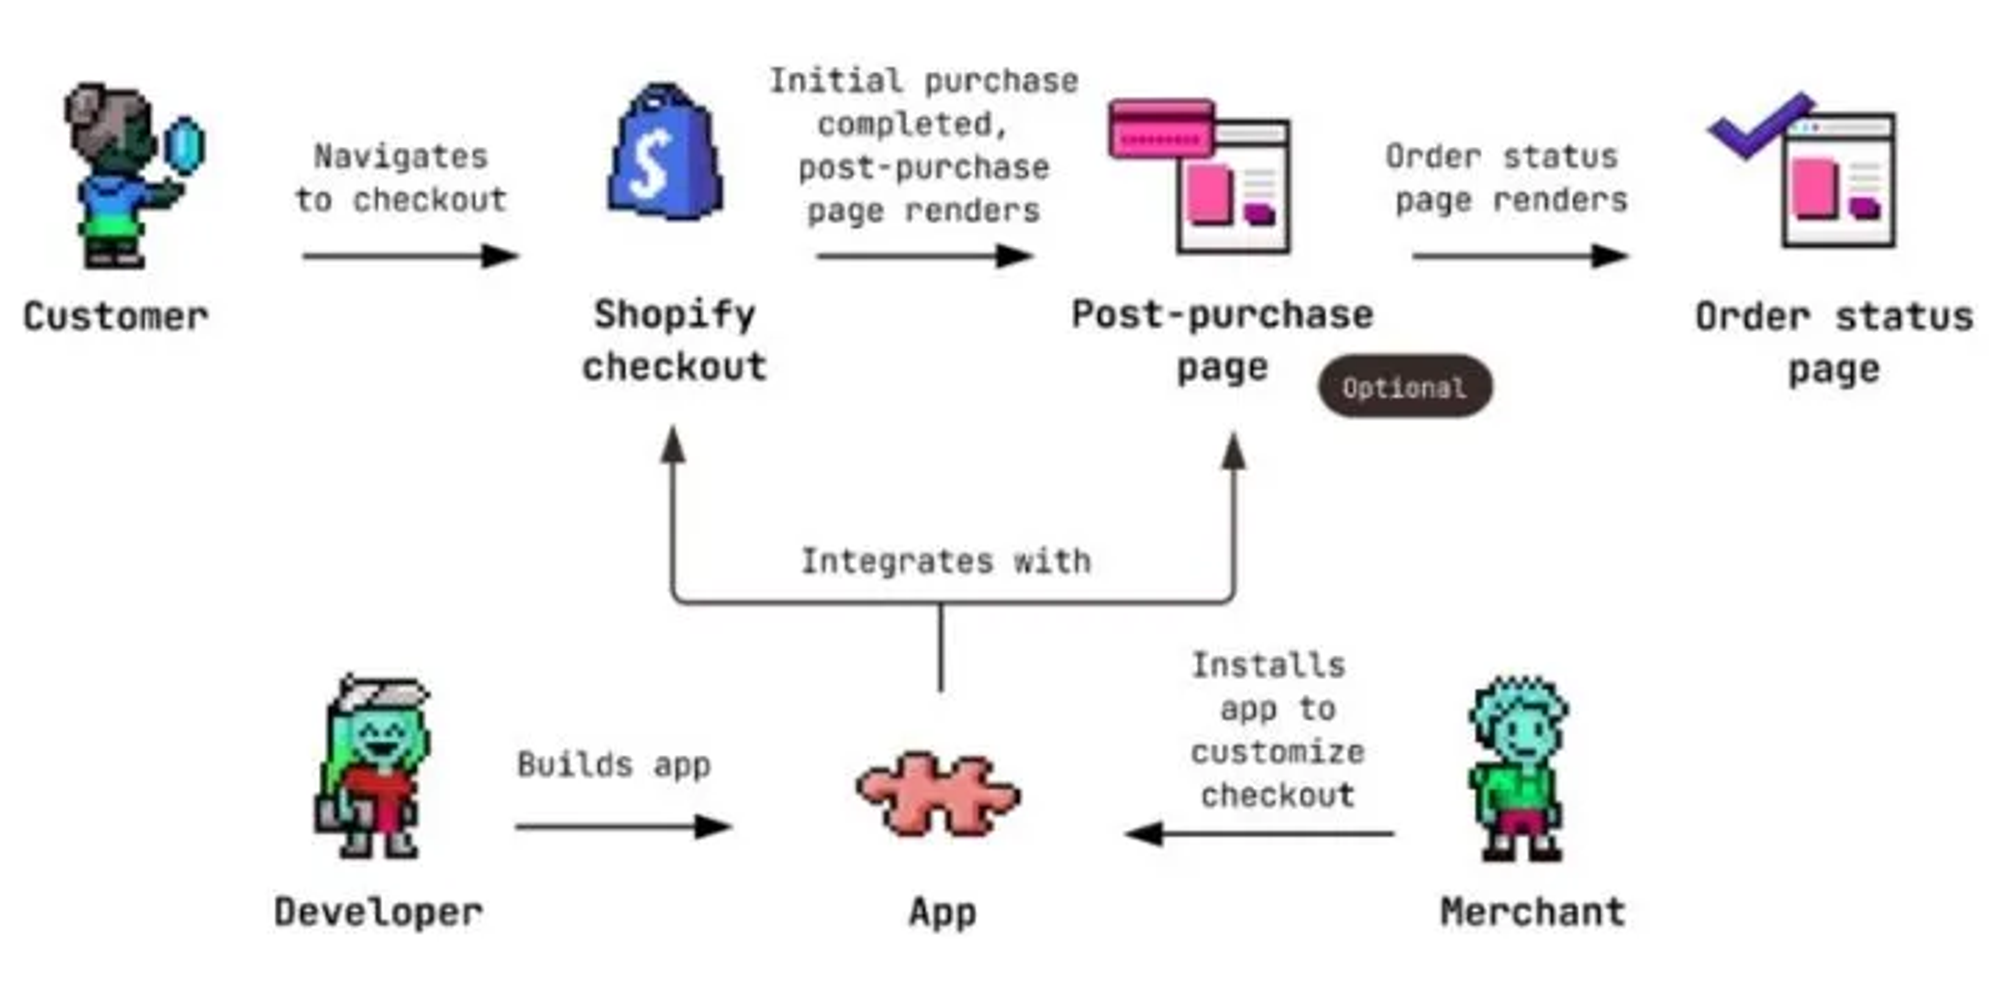
Checkout Extensibility is like giving Shopify store owners easy-to-use tools to make their checkout process better. It's similar to adding blocks or installing apps to customize how the checkout page looks and works. With Checkout Extensibility, merchants can tweak things without needing to be experts in coding. This makes it simpler and safer for them to create a checkout that's just right for their customers, helping to boost sales and make shopping easier for everyone.
- Platform Features: Empower merchants with code-free customization options:
- Checkout Editor: An intuitive, drag-and-drop editor allows merchants to customize checkout appearance by adjusting colors, fonts, and logos. They can also integrate new functionality by installing apps.
- Shopify Pixels Manager: A new section in the Shopify admin enables merchants to securely add and manage pixels that track customer events.
- Checkout Apps from the Shopify App Store: A collection of apps built using native Shopify UI components and APIs. Merchants can install these apps to enhance checkout functionality.
Checkout Extensibility is a new system that replaces the old checkout.liquid setup. Merchants will need to move their customizations from the old system to this new one.
2. What are the Benefits of Checkout Extensibility?
- Easy Customization: Customize your checkout without needing to code. Use the simple editor to change colors, fonts, and logos, and add new features with apps from the Shopify App Store. Everything stays consistent with your store's branding.
- Faster Checkout, More Sales: Checkout extensibility makes the checkout process faster, which means more customers complete their purchases, boosting your sales.
- Seamless Shop Pay Integration: Connect your checkout customizations seamlessly with Shop Pay. This ensures a smooth experience for customers using Shop Pay, which leads to more sales, especially on mobile.
- Better Security: Unlike before, you won't need to worry about regular updates. Checkout extensibility keeps your checkout safe and up-to-date automatically, giving you peace of mind.
3. Upgrading to Shopify Checkout Extensibility
Step 1: Assess Your Customizations
- Navigate to Settings > Checkout in your Shopify admin dashboard.
- Look for the option labeled "View personalized report" and click on it.
- This report will provide you with details about your current checkout customizations, including:
- Categories of customizations (e.g., Branding, Validations).
- Descriptions of each customization.
- Source files where the customizations are located (e.g., checkout.liquid).
- Specific lines of code where each customization starts and ends.
- Download the report for reference. You'll use this information to understand your existing checkout setup and plan your upgrade accordingly.
Step 2: Review Additional Customizations
- After assessing your checkout customizations, go to Settings > Apps in your Shopify admin dashboard.
- Review any installed apps that might be affecting your Thank You and Order Status pages. Take note of these apps as they might require adjustments or considerations during the upgrade process.
Step 3: Address Incompatible Apps
- Identify any apps that use script tags or scripts, as these may not be compatible with the new checkout setup.
- Contact the developers of incompatible apps to inquire about compatibility with Shopify Checkout Extensibility.
- Explore alternative apps in the Shopify App Store that specifically mention compatibility with Shopify Checkout Extensibility or offer similar functionalities without relying on script tags or scripts.
- Test the new apps or updated versions in a development or staging environment to ensure they function correctly and integrate smoothly with the upgraded checkout setup.
- Replace the incompatible apps in your live store with suitable alternatives or updated versions. If no alternatives are available, consider removing the incompatible apps to prevent conflicts or issues with the upgraded checkout setup.
Step 4: Upgrade
- Return to Settings > Checkout in your Shopify admin dashboard.
- Click on "Create draft checkout" to start the upgrade process.
- Review the draft checkout and make any necessary changes based on your assessment and adjustments for incompatible apps.
- Once satisfied, click on "Publish" to apply the upgraded checkout settings to your live store.
- Confirm your decision to replace any existing customizations with the new checkout setup.
- Congratulations! You've successfully upgraded to Shopify Checkout Extensibility while addressing compatibility issues with incompatible apps.
4. Evaluating Customization Value
Now that you've successfully upgraded to Shopify Checkout Extensibility, let's dive into evaluating the value of your customizations.
Understanding Your Customizations
Before migrating to Checkout Extensibility, it's crucial to assess the value of each customization in your current checkout setup. This evaluation ensures that you replicate only the customizations that bring significant benefits to your business while considering alternatives for those that may no longer serve a purpose.
Key Questions to Consider:
- Business Value: What specific benefits does each customization bring to your business?
- Cost Justification: Do the benefits of each customization justify the cost of replicating it in Checkout Extensibility?
- Alternative Solutions: Are there alternative methods to achieve the same benefits? For example, could you achieve similar results using existing public checkout apps or storefront customizations?
Mapping Customizations
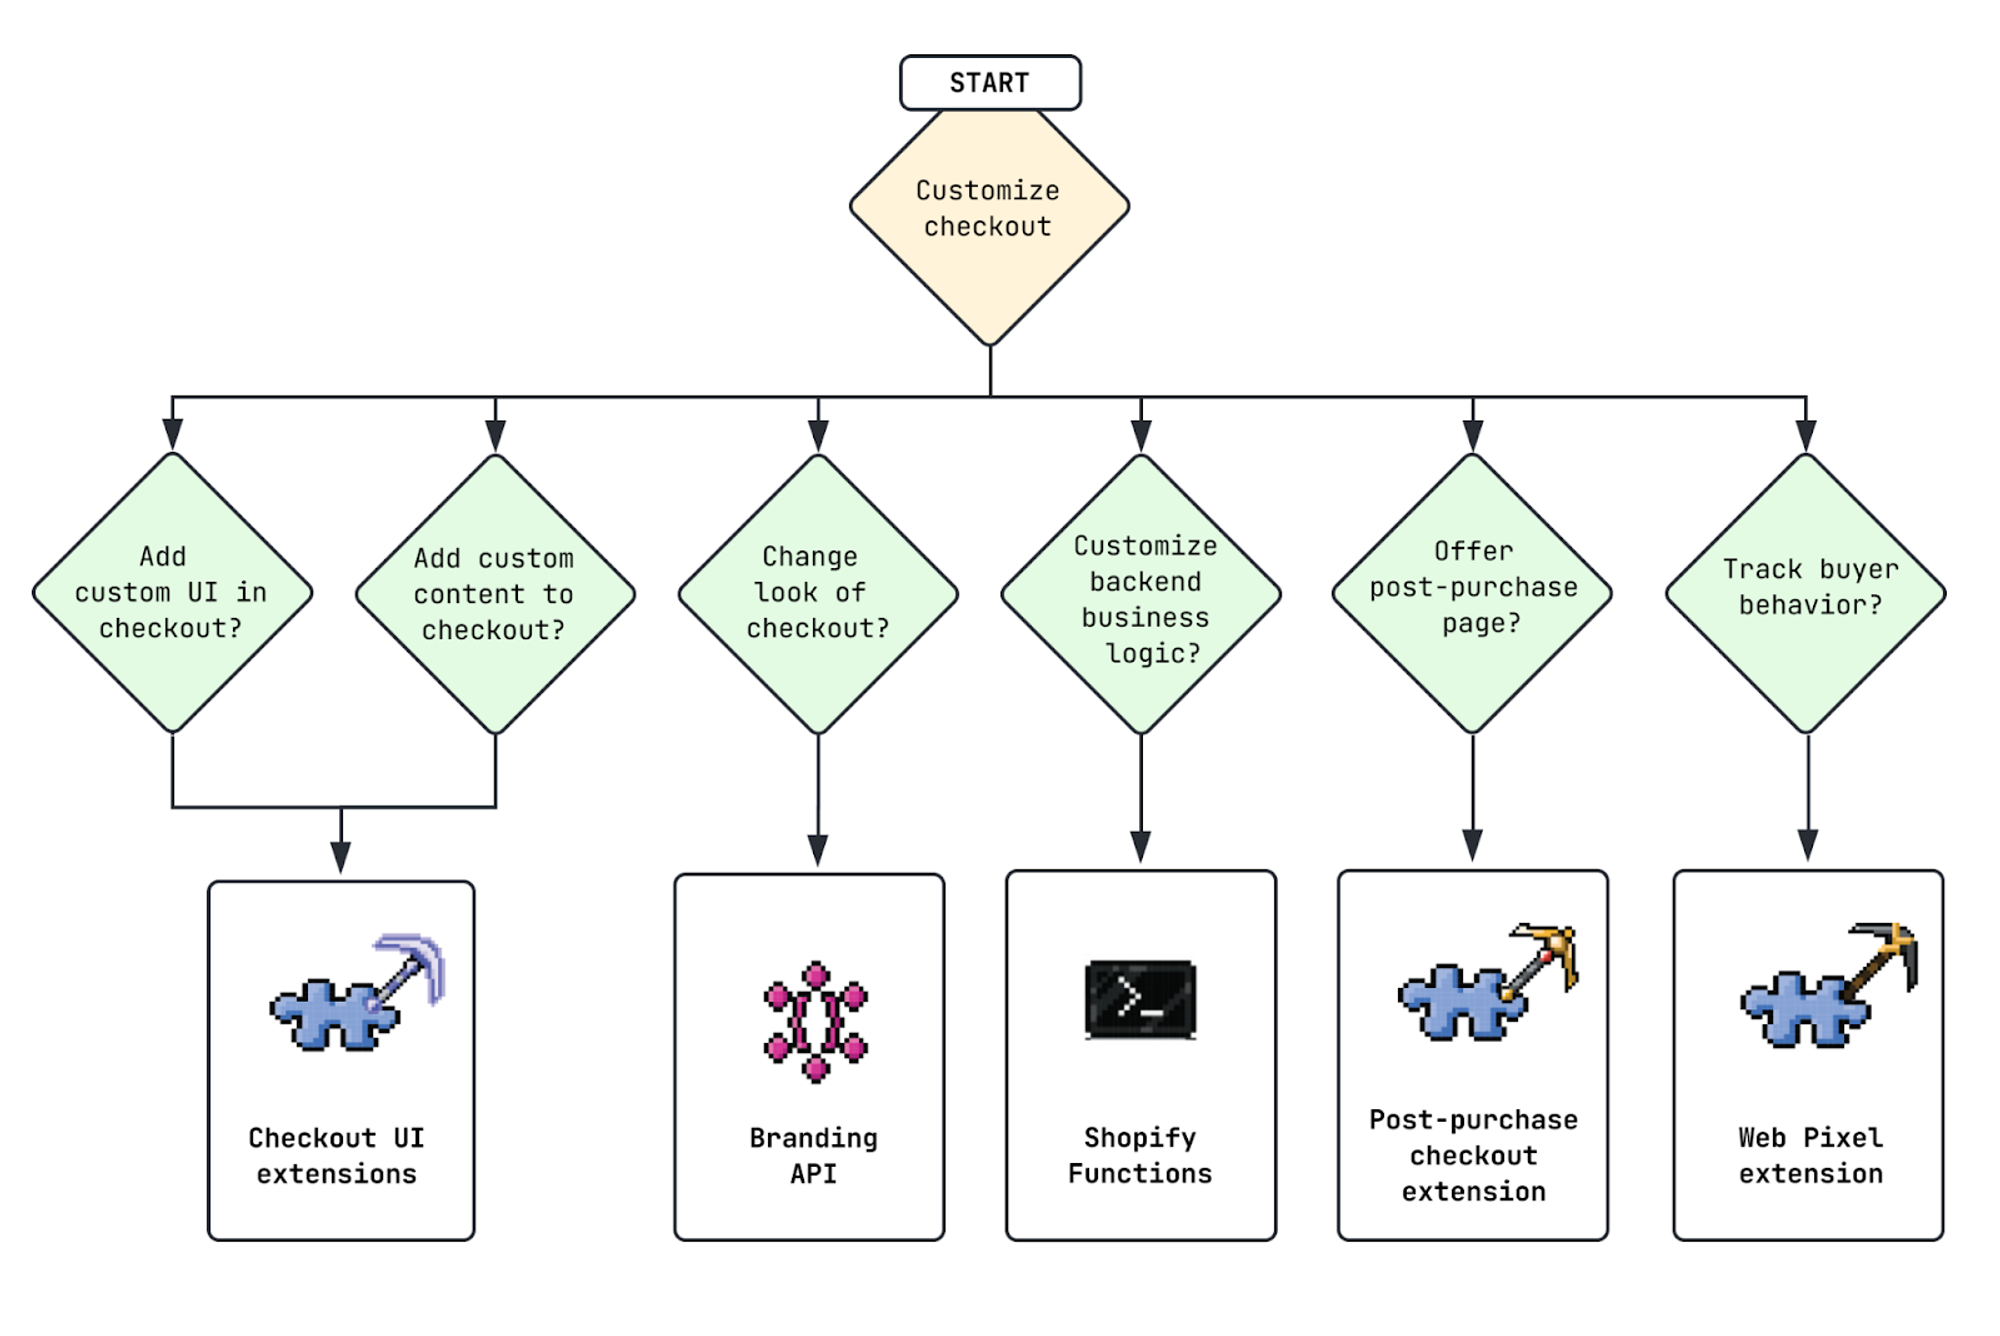
Your customizations may fall into several categories, including adding custom UI and content, changing the checkout's appearance, customizing backend logic, offering post-purchase pages, or tracking buyer behavior. Each customization type requires a different approach for migration and integration into Checkout Extensibility.
Example: Adding Custom UI or Content :
If your checkout includes custom UI elements or content, such as upsells, additional fields, or informational banners, you can replicate these using Checkout UI extensions. These extensions, deployed via apps, allow developers to build custom functionality and UI that integrates seamlessly into the checkout flow. For instance, installing an app from the Shopify App Store or developing a custom app can achieve this customization.
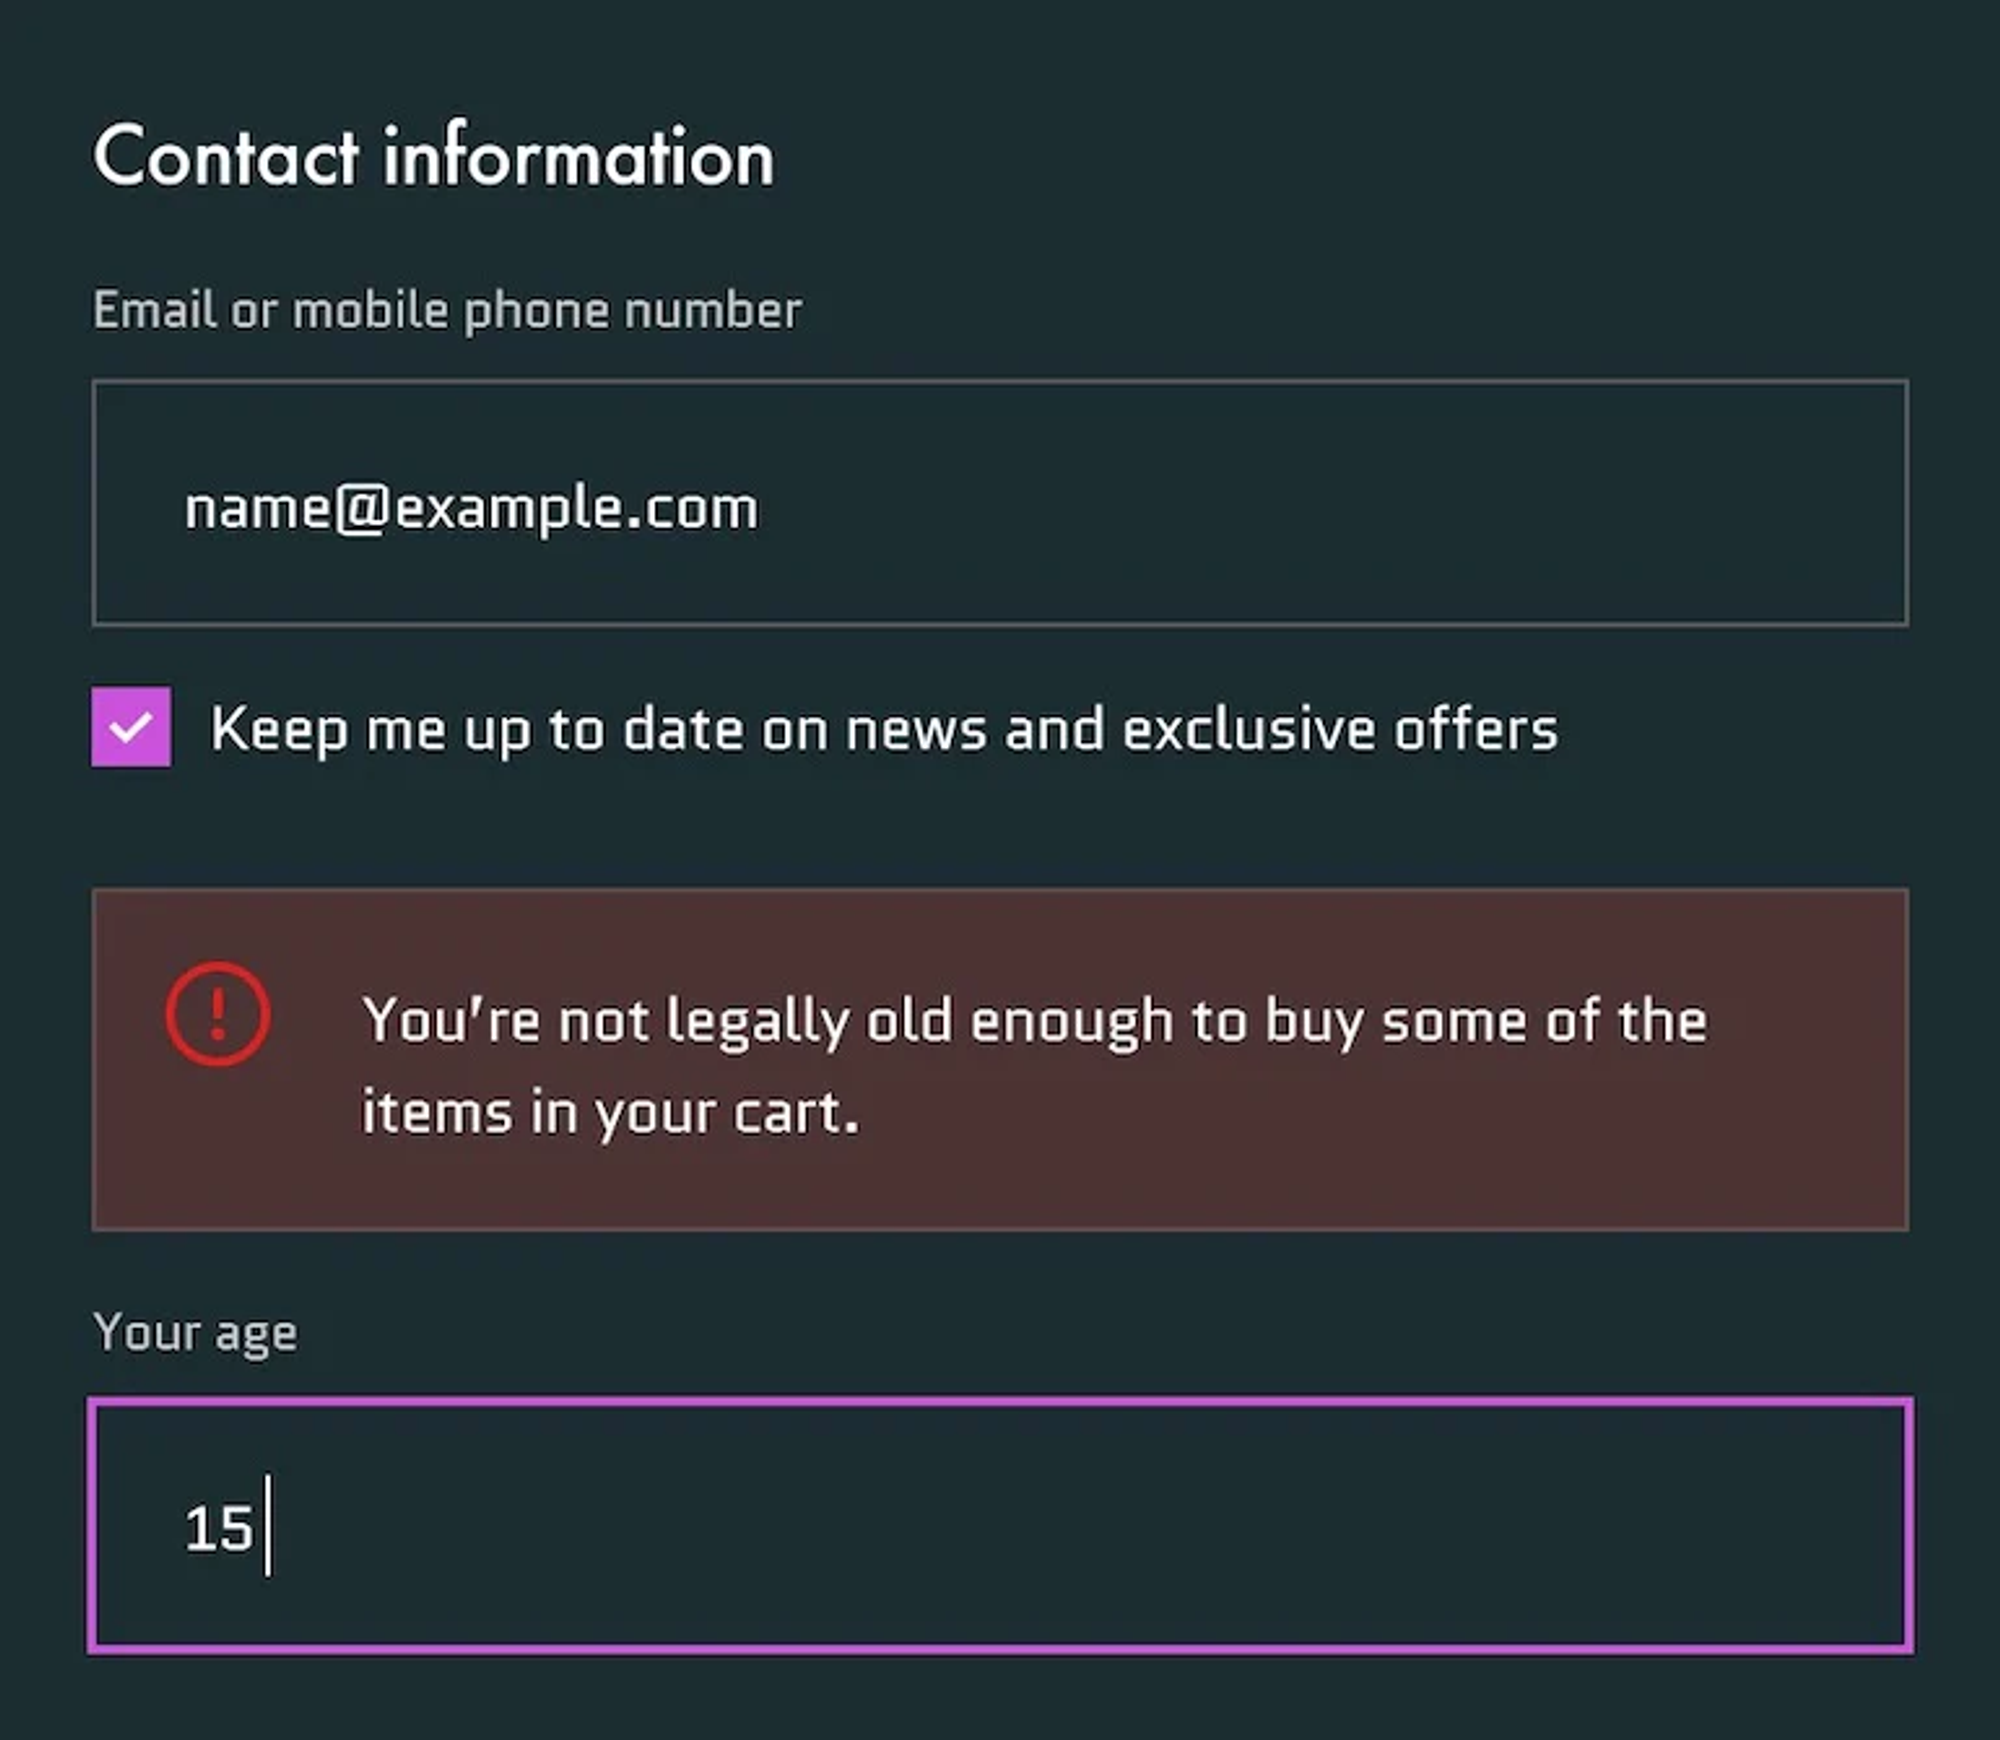
Example: Changing Checkout Appearance with Branding API:
For custom styling, including logos, colors, and fonts, most of these customizations can be replicated in the branding section of the checkout editor. However, for finer control over style elements, such as button radius, the Branding API can be utilized to achieve the desired customization.
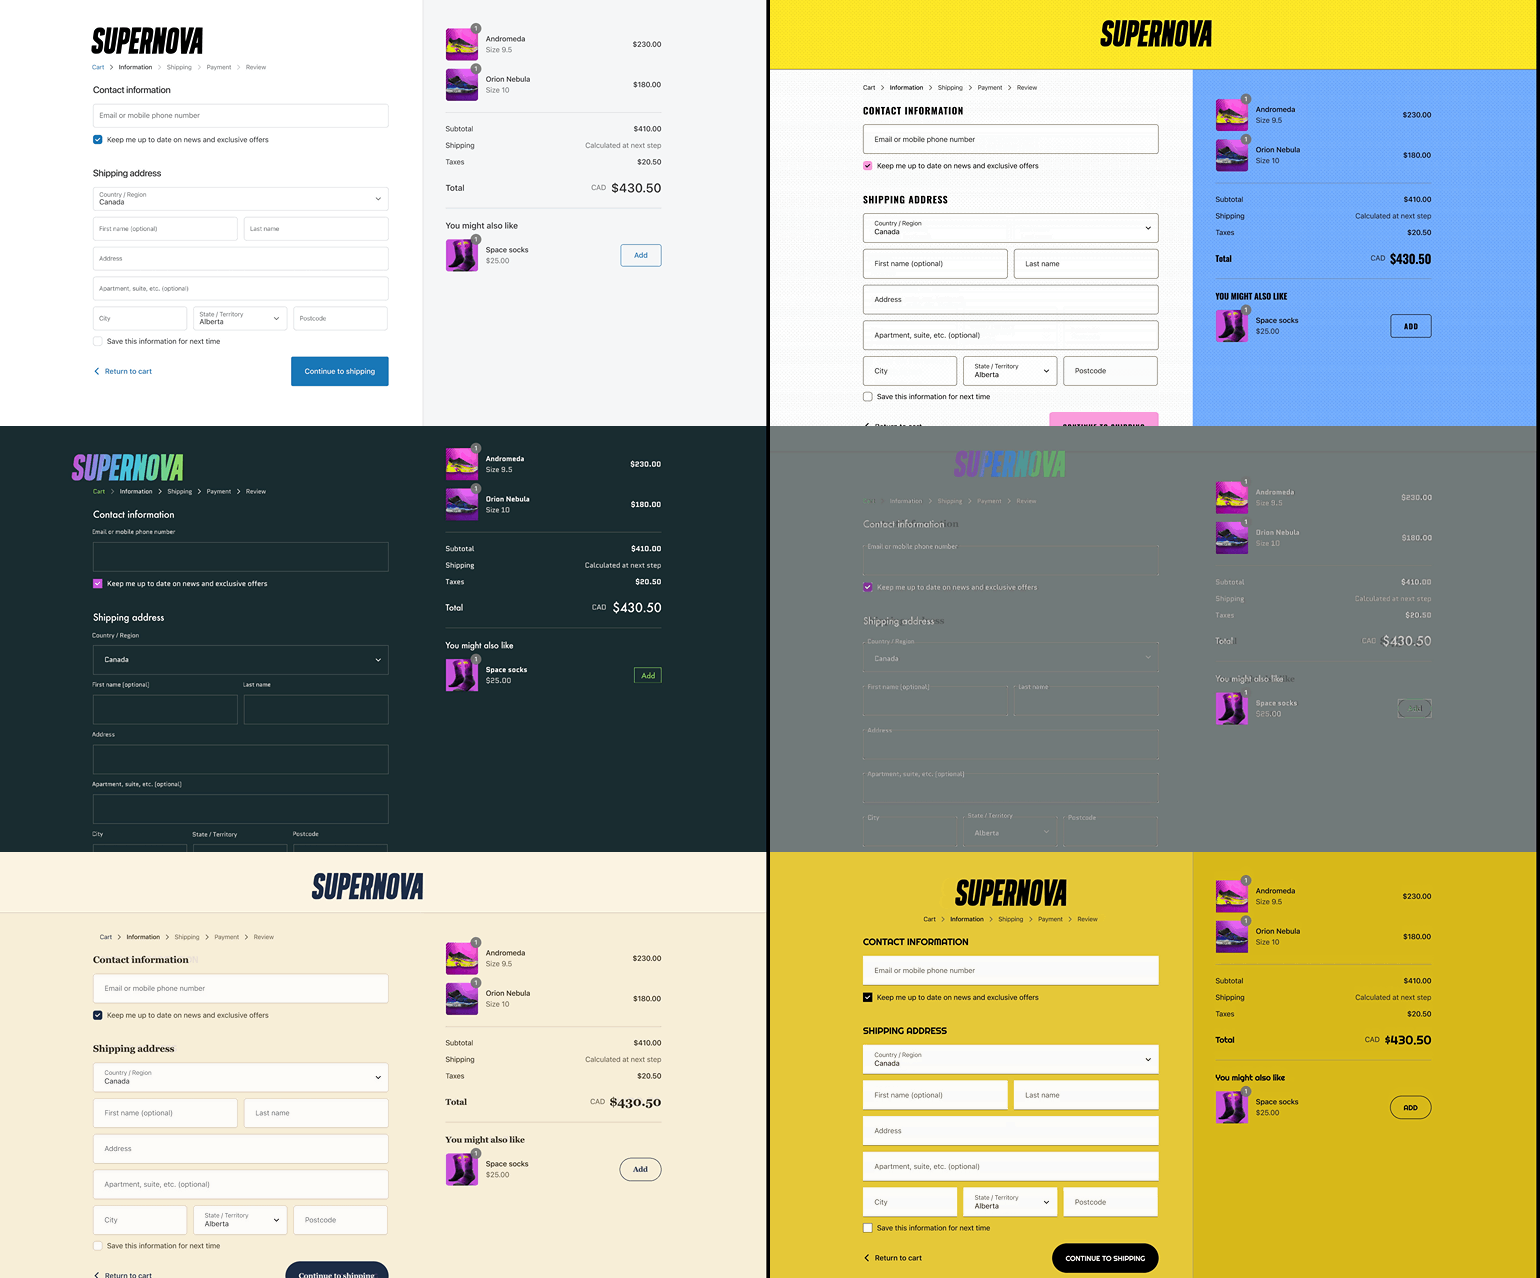
Example: Customizing Backend Logic :
Custom backend logic, such as discounts or payment options, can be replicated using Shopify Functions. These functions, deployed via apps, enable developers to customize the backend logic powering parts of Shopify. Apps from the Shopify App Store or custom app development can facilitate this process.
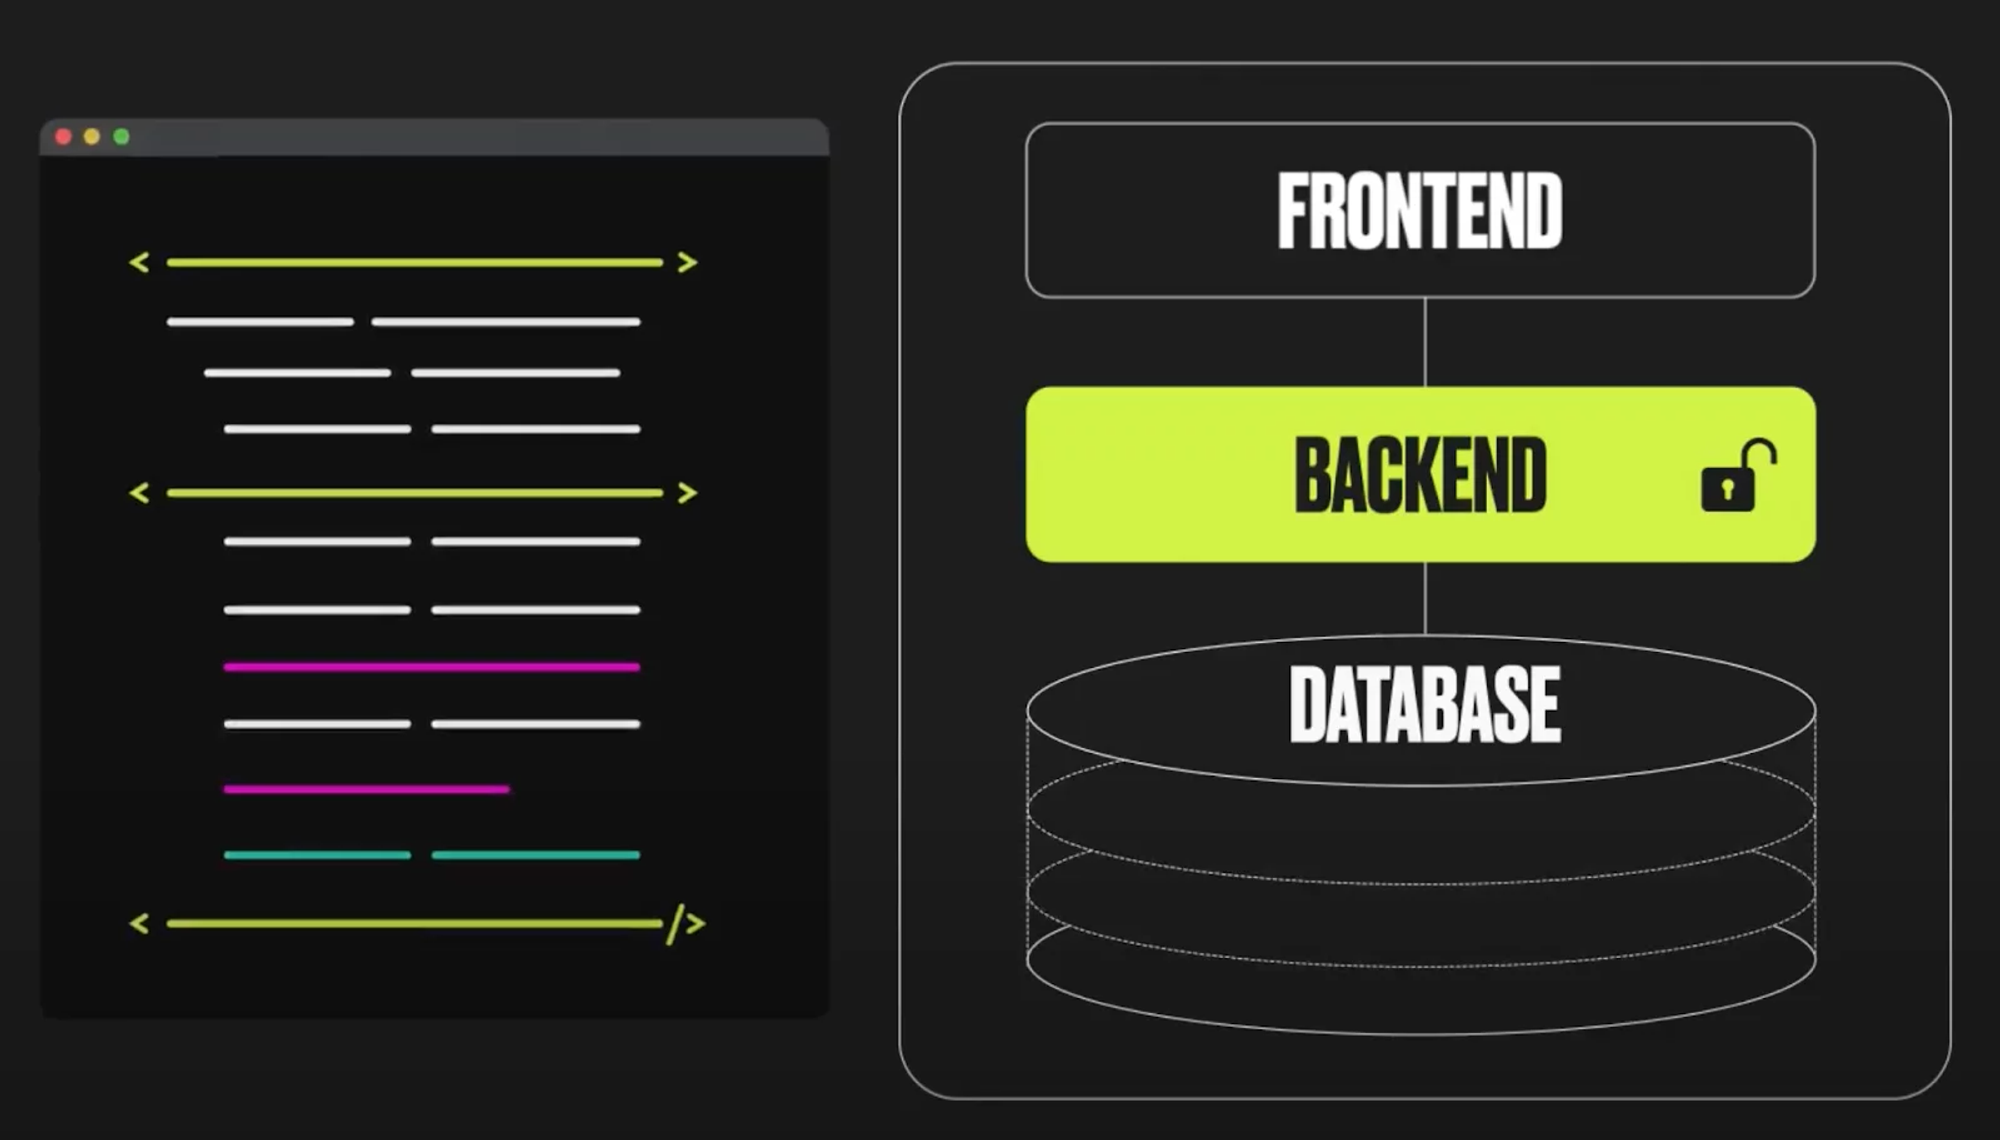
Example: Offering Post-Purchase Pages :
If your checkout includes post-purchase pages for loyalty programs or upsells, you can replicate them using post-purchase extensions. These extensions, deployed via apps, enable you to add post-purchase pages directly within Shopify Checkout, appearing after order confirmation but before the thank you page. Again, apps from the Shopify App Store or custom app development can help achieve this customization.

Example: Tracking Buyer Behavior :
For tracking pixels present in your checkout, such as Meta and Twitter tracking scripts, migration to the new pixel manager is necessary. Pixels can be added via apps built with the web pixel app extension, available in the Shopify App Store. Alternatively, custom pixel integration or Google Tag Manager can be utilized for tracking buyer behavior.
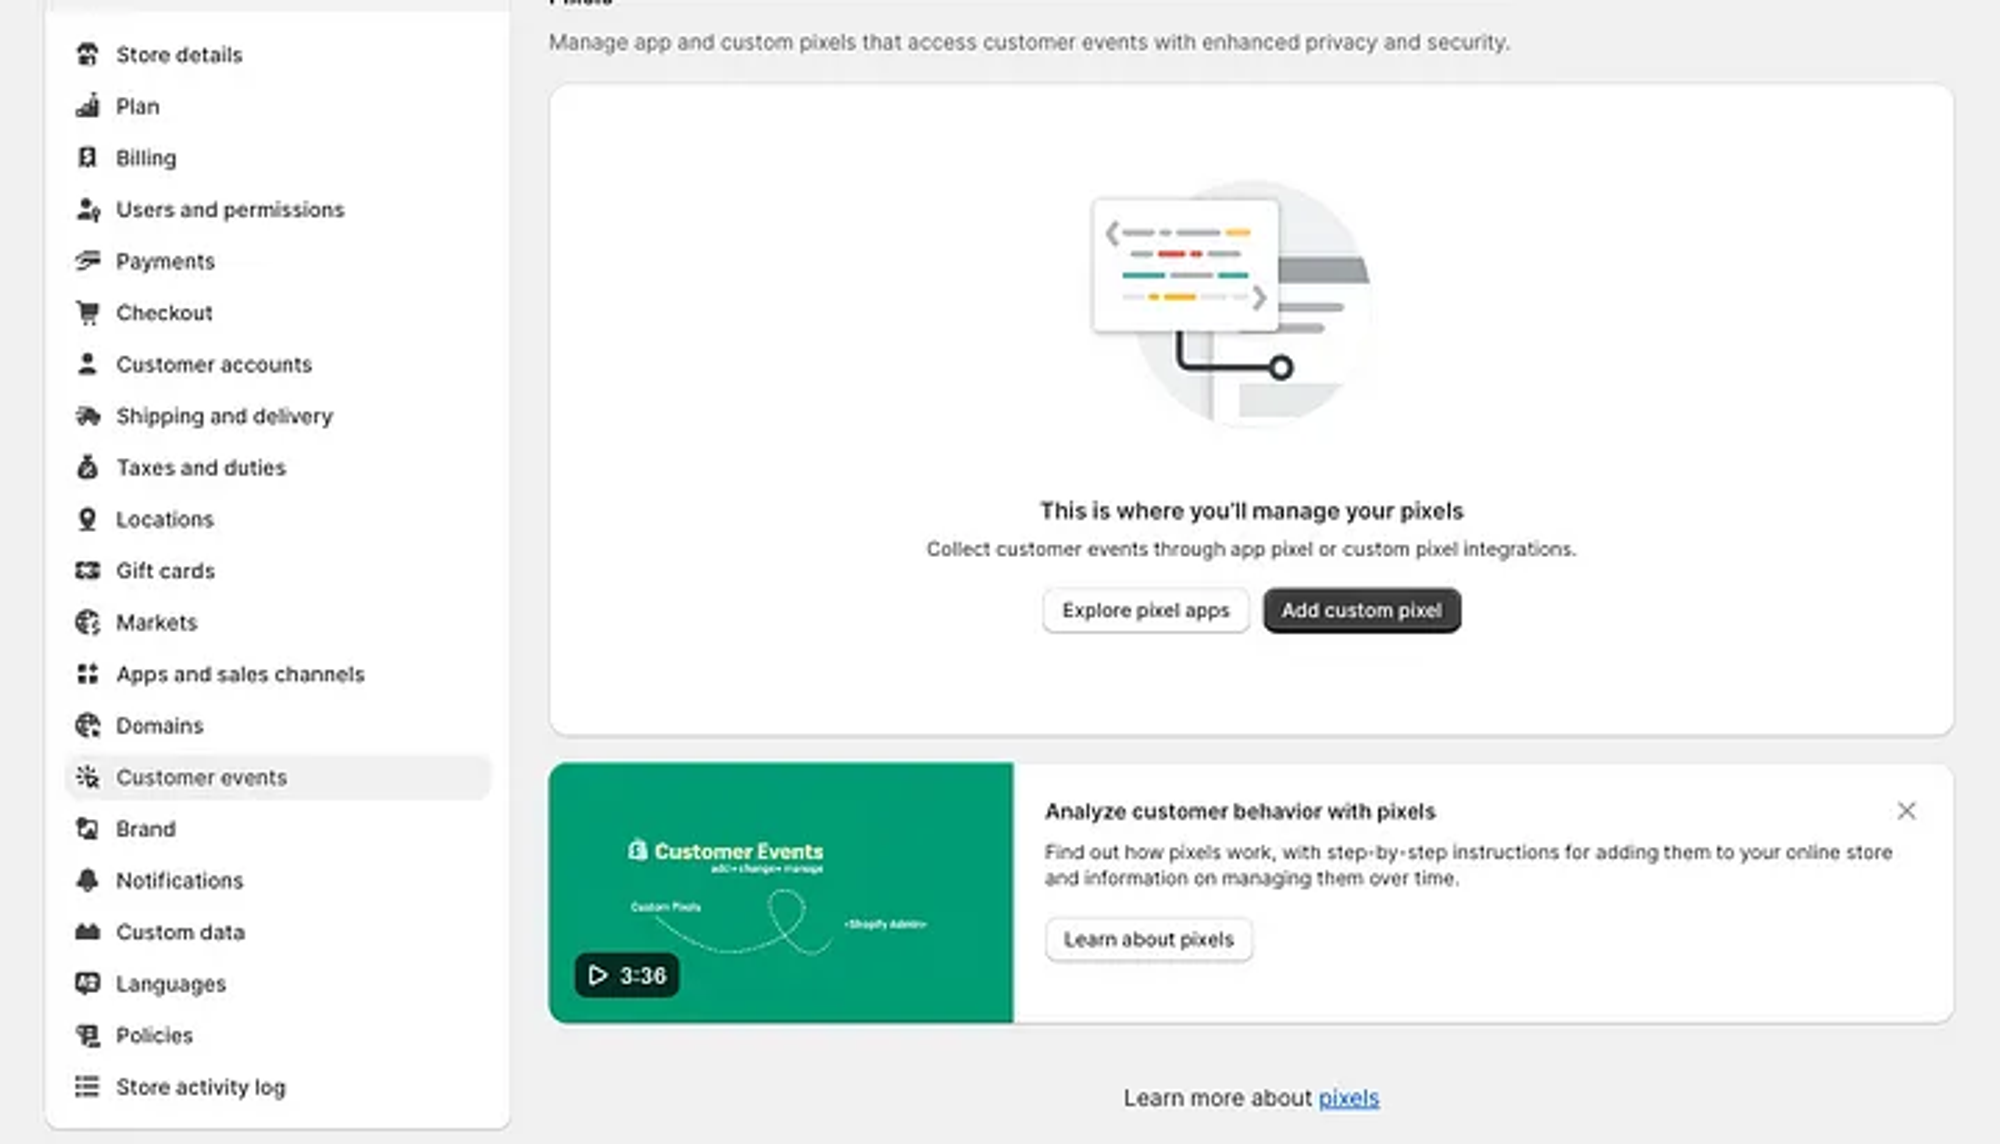
5. Building and Testing Your New Checkout with Checkout Extensibility
Ready to unlock the full potential of Checkout Extensibility and create seamless checkout experiences for Shopify merchants? This guide dives deep into two primary methods available for building and testing your custom checkout extensions:
1. The Checkout Editor (For Merchants):
- Ideal for: Merchants comfortable with a visual approach.
- Focus: Utilize existing apps from the Shopify App Store to add desired functionalities to their checkout.
- Benefits:
- Easy to use: No coding required, perfect for non-technical users.
- Fast and efficient: Drag-and-drop interface for quick customization.
- Wide range of options: Extensive app selection for various functionalities.
- Limitations:
- Restricted flexibility: Relies on existing app features, limiting customization beyond their capabilities.
- Less control: Less control over the underlying code and integrations compared to the development store method.
How to Access:
- Log in to your Shopify admin panel.
- Navigate to Settings.
- Click on Checkout from the left-hand menu.
- Locate the "Customize" button and click on it.
2. Setting Up a Development Store (For Developers):
- Ideal for: Developers building custom Shopify checkout extensions.
- Focus: Build custom app extensions using Shopify APIs to create unique checkout functionalities beyond existing apps.
- Benefits:
- Unmatched flexibility: Full control over code and functionalities for highly customized checkout experiences.
- Advanced integration: Deep integration with Shopify's checkout system for complex features.
- Precise control: Fine-tune every element and behavior within the checkout.
- Limitations:
- Technical expertise required: Requires strong development skills and familiarity with Shopify's APIs and tools.
- Time-consuming: Setting up the development environment and building custom apps can be resource-intensive.
- Thorough testing: Requires extensive testing across various scenarios to ensure compatibility and avoid issues.
3. Choosing the Right Path:
Merchants: If you're comfortable with a visual interface and want to use pre-built functionalities, the Checkout Editor is the easier option.
Developers: If you need to create unique and advanced checkout experiences beyond existing apps, the development store approach provides the flexibility and control you need.
6. Building a Real Example: Crafting a Checkout UI Extension
In this section, we're delving into the exciting realm of building a checkout UI extension for your Shopify store. It's not just about theories; it's about hands-on creation that will directly impact your store's checkout process. So, get ready to dive in and roll up your sleeves for a journey of creativity and innovation!
What You'll Learn:
- Generate a checkout UI extension using Shopify CLI.
- Configure the extension to appear in the checkout flow.
- Utilize the Checkout UI component library to add interactive elements.
- Implement logic for age verification and shipping restrictions.
- Handle error messages and block checkout progress based on conditions.
Requirements:
Before you begin, make sure you have:
- Access to the Shopify Partner Dashboard.
- A development store is set up with the Extensibility developer preview enabled.
- Basic knowledge of JavaScript and React.
- Node.js 18 or higher installed on your system
- A Node.js package manager like npm, Yarn 1.x, or pnpm is installed.
Let's dive into the tutorial, step by step:
Step 1: Setup A Development Store:
Once logged into your partner dashboard, locate the "Stores" section and click on "Add store." From the dropdown menu, choose "Create development store."

- You'll be presented with two options:
- "Create a store for a client": This is typically used when creating a store that will eventually be transferred to a paying merchant.
- "Create a store to test and build": This is the option you'll want to choose for your development purposes. Select this one.
- Build Version:

- By default, the "Current release" build is selected. This reflects the latest stable version of the Shopify platform and is suitable for most development needs.
- If you want to test features still under development, you can choose the "Developer Preview" option. However, stores created with a developer preview cannot be transferred to merchants.
- in this project, we will select the "Checkout and Customer Accounts Extensibility" option to gain access to features related to checkout and customer account customization:
Once you've made all your selections, click the "Create development store" button. Congratulations! Your development store is now up and running, ready for you to experiment and build your Shopify apps or themes.
Step 2: Getting Started with Shopify CLI
Shopify CLI is a command-line interface tool that helps you build Shopify apps. It quickly generates Shopify apps and generates app extensions. You can also use it to automate many common development tasks.
To start creating your checkout UI extension, first, install Shopify CLI by running the following command in your terminal:
After installation, initialize your project by running:
When you run the command, Shopify CLI guides you through a series of prompts to set up your new checkout UI extension. Let's go through each prompt and its significance:

- Project Name Prompt: Here, you're asked to provide a name for your project. This name will be used as the directory name for your project files. In our example, we entered checkout-ui.
- Get Started Building Your App Prompt: In this step, you're presented with options to start building your app:
- Start with Remix (recommended):
- Choosing this option sets up your project with a predefined project structure and configurations, including authentication setup and basic UI components. It's designed to streamline the initial setup process and provide a starting point for developers who may need more guidance.
- Start by adding your first extension:
- Selecting this option initiates the process of adding a new extension directly to your project without any predefined configurations. It's useful when you already know what extension you want to add and don't need the additional scaffolding provided by the "Remix" option.
- Start with Remix (recommended):
Once you've made your selections, Shopify CLI swings into action, scaffolding your project and generating the necessary files based on your preferences.
But wait, there's more! When you're ready to generate the extension, fire up the terminal and unleash the magic with:
executing this command triggers the generation process, but before the extension is created, The CLI will ask whether you want to create a new app or connect to an existing one. Since we're starting fresh, we'll choose to create a new app.
After selecting to create a new app, you'll be prompted to provide an app name. In our example, we'll name it "checkout-ui."
Once the app name is confirmed, the CLI will present you with a list of extension types to choose from:
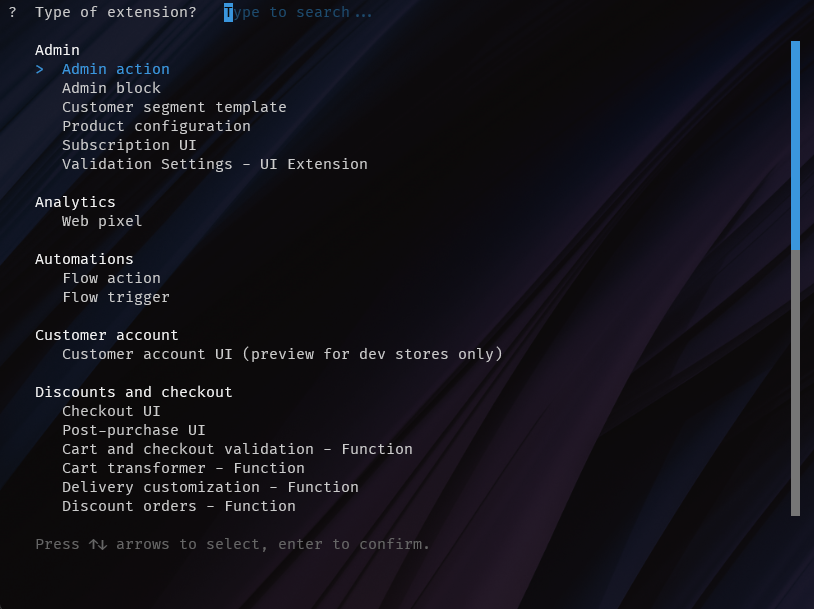
- Admin: Extensions related to customizing the Shopify admin interface.
- Analytics: Extensions for integrating analytics tracking or pixels.
- Automation: Extensions for automating tasks or workflows within Shopify.
- Customer account: Extensions for customizing the customer account section of Shopify stores.
- Discounts and checkout: Extensions related to customizing the checkout process, including UI customization, post-purchase actions, validation settings, and more.
Since we're focusing on customizing the checkout flow, we'll select "Checkout UI" from Discounts and checkout
After selecting the Checkout UI extension, you're prompted to name your extension. This name will be used to identify your extension in the checkout editor when you have a lot of extensions connected to the same app.
Next, you're asked to choose the development environment for your extension. You have several options to choose from:
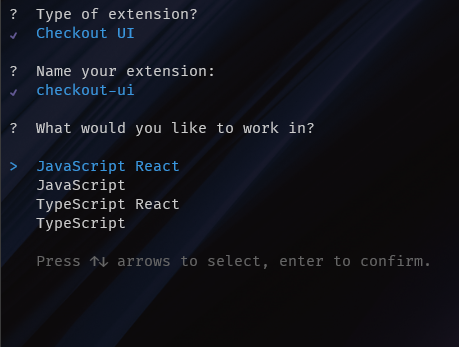
- JavaScript React: This option allows you to develop your extension using JavaScript and the React framework. React is a popular JavaScript library for building user interfaces.
- JavaScript: Choose this option if you prefer to develop your extension using JavaScript without the React framework.
- TypeScript React: Similar to the JavaScript React option, but with TypeScript, a superset of JavaScript that adds static typing to the language.
- TypeScript: Choose this option if you prefer to use TypeScript without the React framework.
let's select "JavaScript React" as the development environment for building our extension.
Step 3: Exploring Your Checkout UI Extension
After selecting "JavaScript React" as the development environment for building your extension, let's delve into the files generated for your Checkout UI extension.
In your project directory, navigate to the extensions folder. Here, you'll find a subfolder named checkout-ui, Within this folder, you'll find two essential files:
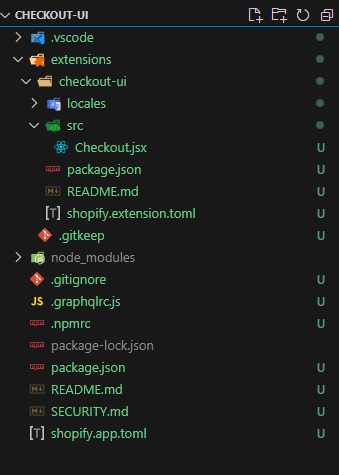
- The
Checkout.jsx: serves as the heart of your extension. It contains the core logic and code responsible for:- Importing necessary libraries.
- Interacting with Shopify's APIs to access and modify checkout data.
- Defining the structure and appearance of your custom UI elements within the checkout process.
- Registering your extension at the desired location within the checkout flow.
here is the stater code:
In the Checkout.jsx file, the import statement retrieves specific modules from @shopify/ui-extensions-react/checkout, enabling access to functionalities vital for developing Checkout UI extensions:
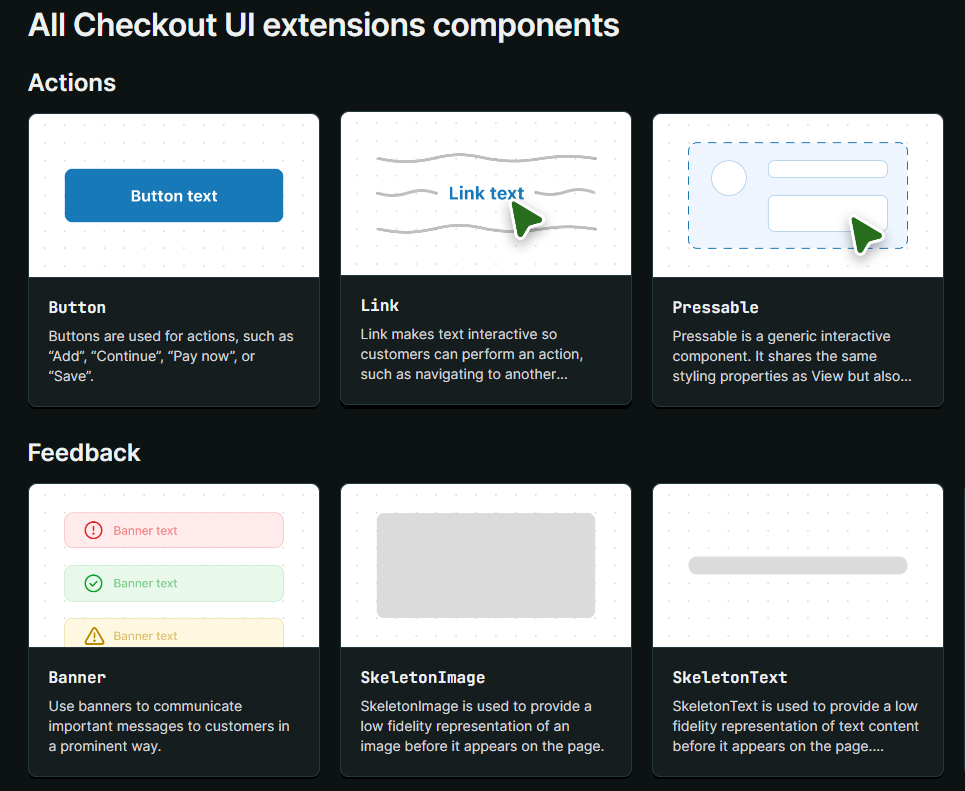
- Banner: A pre-designed banner component provided by the package, offering visually appealing display options. It's perfect for showcasing announcements, promotions, or other key information within the checkout flow. you can view All Checkout UI extension components
- the reactExtension function facilitates the registration of custom React components within Shopify's checkout extension system. It acts as a crucial link between your React code and Shopify's checkout environment. The reactExtension function takes two arguments:
- The first argument is the target location where your extension will be injected into the checkout flow. In this example, it's 'purchase.checkout.block.render'. You can explore additional locations here.
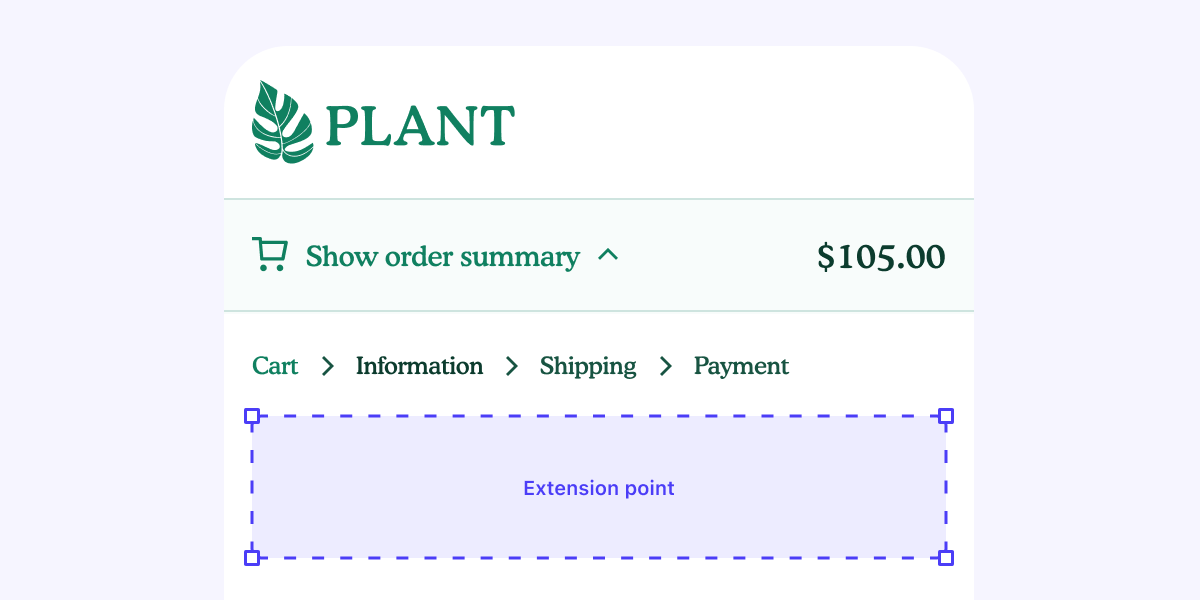
- The second argument is a callback function that returns the JSX code for rendering the extension. In this case, it returns a component named Extension, which contains a Banner component provided by the package.
- The first argument is the target location where your extension will be injected into the checkout flow. In this example, it's 'purchase.checkout.block.render'. You can explore additional locations here.
- The shopify.extension.toml file is essential for configuring your Checkout UI extension. It contains various sections to define the extension's properties, including its name, targets, capabilities, metafields, and settings.
Let's break down each section:
This line specifies the version of APIs that your extension will utilize. It ensures compatibility and consistency with the Shopify platform, ensuring that your extension can interact effectively with the available APIs.
This section defines the extension itself. It specifies that it's a UI extension (type = "ui_extension") named "checkout-ui". The handle provides a unique identifier for the extension.
Here, the targeting of the extension is defined. It determines where in Shopify the extension will be injected and which file contains the extension's source code. The module property points to the file Checkout.jsx within the src directory. The target property indicates that the extension will be injected into the rendering of the checkout block during the purchase process.
This section specifies the capabilities of the extension. In this case, it indicates that the extension has access to directly query Shopify’s storefront API (api_access = true). This capability allows the extension to retrieve data from Shopify's storefront API directly.
Step 4: Implementing Age Verification in Checkout
Now that we've explored the basics of our extension setup, let's dive into implementing the logic for adding an age checkbox to our checkout. This checkbox will prevent users from completing the checkout process if they are under 18 years old.
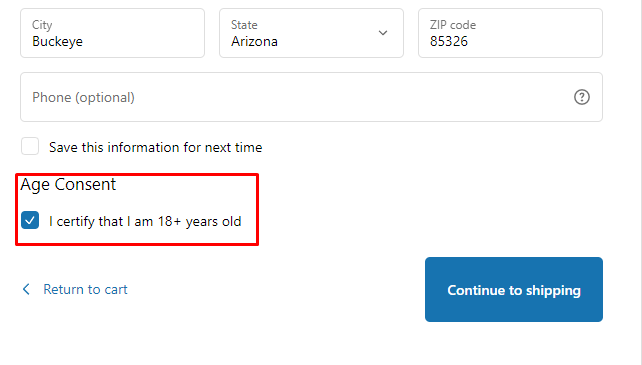
1. Adjusting Target Location
To position the checkbox below the input fields, we'll change the target location to "purchase.checkout.delivery-address.render-after". Remember to update the target location in the shopify.extension.toml file accordingly.
Importing Extension API
We import two extension APIs:
- useBuyerJourneyIntercept: Enables blocking the checkout process based on conditions like age verification. Explore more extension APIs here.
- useExtensionCapability: Allows accessing capabilities defined in shopify.extension.toml. To block checkout progress, we set the block_progress capability in this file. However, obtaining permission from the merchant is essential for this action.

3. Implementing Age Verification
Explanation of useBuyerJourneyIntercept
The useBuyerJourneyIntercept hook intercepts the buyer's journey through the checkout process. It allows us to block the checkout process based on conditions we specify.
In the provided code:
- We check if the isAgeChecked state is false, indicating that the user has not verified their age.
- If the age is not verified, we return an object with behavior set to "block". This blocks the checkout process.
- If the age is verified, we return an object with behavior set to "allow", allowing the checkout process to proceed.
By implementing this logic, we ensure that users must verify their age before completing the checkout process, thus adhering to any age restrictions or requirements set by the merchant.
Step 4: Implementing Shipping Restrictions in Checkout
After implementing age verification logic, let’s add shipping restrictions to prevent customers from continuing checkout if they're from these states: 'AL', 'AR', 'IN', 'VT', 'WI’.
Code Additions:
- Accessing Customer Province Code: We use the useShippingAddress API to access the customer's province code. This allows us to determine the customer's location. To use useShippingAddress and similar APIs to access protected customer data, developers must obtain permission from Shopify. This involves enabling permissions in the Shopify Partner Dashboard, following strict security guidelines, and undergoing a review process. read more about protected customer data
- Defining Restricted States: We define an array called restrictionStates, listing the states where shipping is restricted.
- Blocking Checkout for Restricted Locations: We use useBuyerJourneyIntercept to intercept the checkout process. If the customer's province code matches a state in restrictionStates, we block checkout and display a banner indicating the restricted location.
- Displaying Banner for Restricted Locations: We conditionally render a banner component if showBanner state is true. This banner informs the customer that shipping is restricted in their area.
These additions ensure that customers are aware of shipping restrictions based on their location and prevent them from completing checkout if they're in a restricted area.
Step 4: Previewing and Testing The Extension on Dev Store
To thoroughly test your extension on your development store, follow these detailed steps:
-
Run Development Server: Open your terminal and navigate to your app directory. Execute the
npm run devcommand to start the development server. Ensure that your development store has the Checkout and Customer Accounts Extensibility developer preview enabled. after runningnpm run devyou will see the following:
-
Access Preview: Once the server is running, press p in the terminal to open the developer console. This console provides access to various tools for testing and debugging your extension.
-
Start Preview: Click on the preview link specific to your custom field extension within the developer console page. This link allows you to view your extension in action within the context of the Shopify checkout process

-
Verify Rendering: After accessing the preview link, carefully inspect the checkout process. Check that your extension, such as the Provide delivery instructions checkbox, appears correctly in the Shipping step of the checkout. Ensure that it functions as intended and aligns with your design and functionality requirements.
-
Final Result:
Step 4: Deploying the Extension
When it's time to release your changes and make them available to users, follow these steps to deploy the extension:
- Navigate to Your App Directory: Open your terminal and go to the directory where your app is located.
- Run the Deployment Command: Use one of the following commands to deploy your app version. Optionally, you can provide a version name or message using the -version and -message flags.
Running this command creates and releases an app version, replacing the current active version served to stores with your app installed. It may take a few minutes for users to receive the update.
After running the deploy command using Shopify CLI, an app version is created and released. You can revert to a previous version at any time, or create a new version directly from the Partner Dashboard.
Selecting a Distribution Method:
Before sharing your app with merchants, you must choose a distribution method in the Partner Dashboard. The distribution method depends on your app's purpose and audience, with different capabilities and requirements for each.
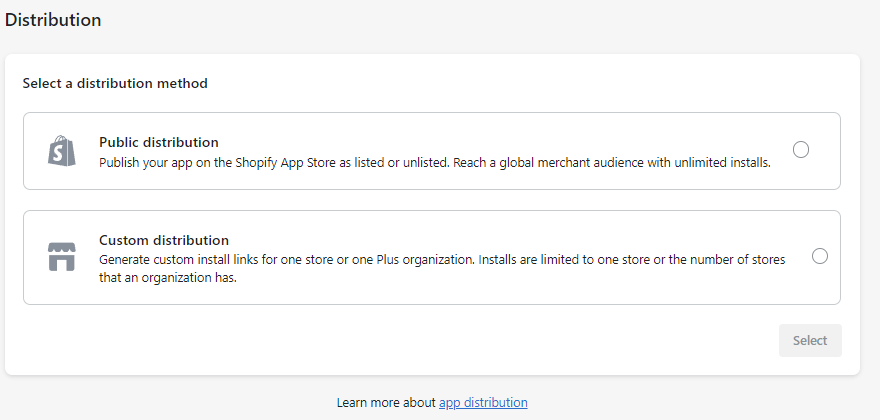
- Public Distribution: Choose this method to make your app publicly available through the Shopify App Store. This allows you to distribute or sell your app to numerous merchants.
- Custom Distribution: Opt for this method if you've built a custom app intended for distribution to specific stores or multiple stores within the same Plus organization using a link.
Note: Once you've selected a distribution method, it cannot be changed. Ensure you understand the features and limitations associated with each distribution type before making a selection.
Selecting a Distribution Method:
- Access the Partner Dashboard and navigate to Apps.
- Choose your app from the list.
- Select a distribution method from the table.
- Click Select to save your selection.
For apps intended for public distribution, begin creating your Shopify App Store listing and, when ready, submit your app to the app review team for evaluation. If custom distribution is chosen, install your custom app on individual stores or multiple stores within the same Plus organization as needed.
Summary
Checkout Extensibility is a new, user-friendly system by Shopify that enables merchants to customize their checkout process without coding expertise, offering code-free customization options like the Checkout Editor, Shopify Pixels Manager, and Checkout Apps from the Shopify App Store. As the traditional checkout.liquid setup will be deprecated in August 2024, merchants should transition to Checkout Extensibility to benefit from easy customization, faster checkout, seamless Shop Pay integration, and better security. To upgrade, merchants should assess customizations, review additional customizations from installed apps, address incompatible apps, and follow Shopify's upgrade guide. Evaluating customization value involves understanding customizations, considering business value, cost justification, and alternative solutions, and mapping customizations to appropriate categories.

